quinta-feira, 4 de outubro de 2012
segunda-feira, 1 de outubro de 2012
2.018PÁGINAS
DESTE WIKI
DESTE WIKI
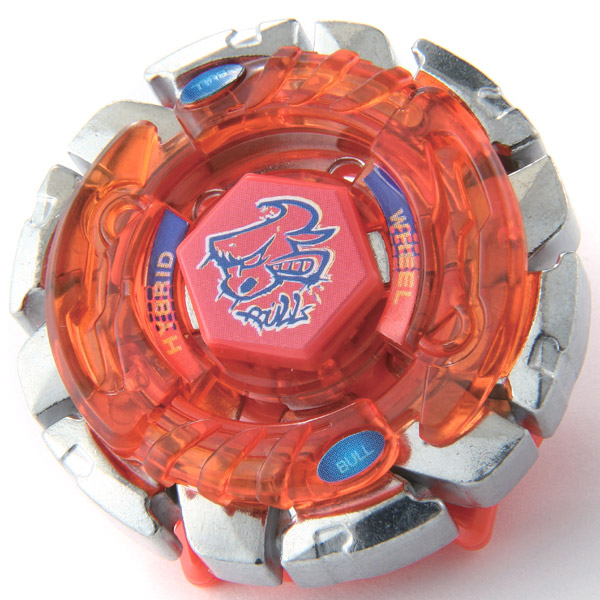
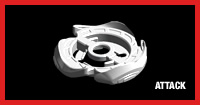
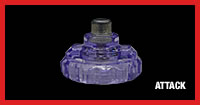
Touro escuro H145SD é um Equilíbrio-Type Beyblade que aparece na Saga de metal de anime e mangá. O proprietário é Benkei Hanawa . Ele foi originalmente dado ao Benkei, para que ele pudesse derrotar Gingka Hagane. A variação lenda do Touro Negro H145SD é 125SF Touro da meia-noite .
Parafuso rosto: Bull
Anel de Energia: Bull
Personalizações
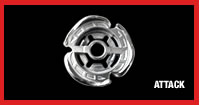
Roda de fusão: Dark
Faixa de rotação: Horn 145 (H145)
Personalizações:
Perfromance Dica: Semi Defesa (SD)
Personalizações
Movimentos especiais
Trivia
| Touro escuro H145SD | |
|---|---|
 | |
| Número: | BB-40 |
| Proprietário: | Benkei Hanawa |
| Parafuso rosto | Touro |
| Anel de Energia | Touro |
| Roda de fusão | Escuro |
| Girar faixa | H145 |
| Dica de desempenho | SD |
| Primeira Aparição (Anime) | Charge! Poder touro |
| Primeira Aparição (Manga) | N / A |
| Tipo | Saldo |
Conteúdo[ mostrar ] |
Parafuso rosto: Bull  Editar
- Peso: 0,7 gramas

O rosto desta Beyblade retrata Taurus, um dos 12 símbolos do zodíaco. É a coloração é um pouco diferente do seu homólogo da luta do metal, Bull. Ele não tem um parafuso com a face impressa ou tatuados, ao contrário da Contraparte.
Anel de Energia: Bull Editar
- Peso: 3,3 gramas

Personalizações Editar
- Fantasma Touro AD145EWD (Vigor)
- Duo Touro BD145/E230RDF/RS/RSF (Defesa)
- Morte Touro BD145RDF/RS/RSF (Defesa)
Roda de fusão: Dark Editar
- Peso: 31,4 gramas
Ataque: 3 - Defesa: 3 - Resistência: 2
Faixa de rotação: Horn 145 (H145) Editar
- Peso: 4,0 gramas

Isto mostra o molde original de H145, mas mostraram problemas de quebra, de modo que os espaços foram reforçados. Ele pode ser usado em combos de ataque e defesa, no entanto, é horrível, tanto devido ao recuo, e também arranhões chão. Além disso, se lançado incorretamente, H145 fará com que a Bey a saltar em torno do estádio em uma rotação automática para fora. No entanto, com a prática desta faixa poderia ser usado para bater Beys outros fora do estádio. Esta faixa é feita para "agarrar" Beyblade do adversário quando atingem a faixa, mas que raramente acontece. H145 é superado pelo BD145, GB145, 230, etc, mas é ótimo para ataques de quebra. No geral, H145 é uma pista que não tem utilidade real e faz a Bey perder rotação quando a abrandar.
Personalizações: Editar
- MF-H Leoa H145RF (Ataque)
Perfromance Dica: Semi Defesa (SD) Editar
- Peso: 0,51 gramas
Tudo se resume a preferência pessoal para decidir se a utilizar Defesa Semi ou ampla defesa, porque eles são tão estreitamente alinhados. Para Vigor pura, é impossível dizer que ganharia um determinado jogo, mas ampla defesa seria prepará-lo para situações mais por ser capaz de tomar hits melhores do Semi Defesa. Teste ambos e decidir por si mesmo o que funciona melhor para o que você está tentando fazer. Dependendo se você está disposto a sacrificar alguma da Defesa, mas não mais Stamina.
Personalizações Editar
- Fantasma Bull / Kerbecs AD145SD (Vigor)
Movimentos especiais Editar
Lista completa: movimento de acabamento Benkei em metal Luta Beyblade DS é Lustful Rocha (ラーストフルロック, raasutofuru Rokku ).
- Touro Uppercut : primeiro movimento Benkei de acabamento é Uppercut Bull. (ブルアッパー, Buru Appaa) Benkei usado pela primeira vez este ataque à Episódio 4 (anime).
- Touro selvagem Ataque Combo 16: segundo movimento Benkei de acabamento é selvagem Touro Ataque Combo 16 (猛牛16连撃, Mougyuu Juuroku-rengeki ), usado pela primeira vez no mangá no capítulo 10 (mangá).
- Red horn Uppercut : segundo movimento Benkei de acabamento é superior Red horn (レッドホーンアッパー, Reddo Hoon Appaa ), usado pela primeira vez no episódio 16 (anime).
- Tornado Touro Superior : Terceiro movimento Benkei está terminando é Uppercut Touro Tornado . Foi usado no episódio 19 (Anime).
- Stampede máximo : quarto movimento Benkei de acabamento é Stampede máxima (最大スタンピード), usado pela primeira vez no episódio 43 (anime).
Trivia Editar
- Mesmo que isso é ilegal, se SD fica achatada, que se move muito rápido, como um ponta tipo de ataque.
- Em Metal Masters do jogo, um "Blader bad boy" usa um H145SD Touro Negro.
- É o Beyblade primeiro a ter a faixa de rotação H145.
- Até agora, a Bull escuro é a Beyblade só para ter o combo H145SD.
- Quando Doji deu Benkei este Bey, disse-lhe que é especializada em ataques superiores, o que é verdade na realidade e do anime.
- Cara Bull tem o estilo graffiti, simbolizando que o seu proprietário pode ter sido parte de uma gangue ou grupo ilícito.
Spiral Capricorn 90MF
Talk6
2,018PAGES ON
THIS WIKI
THIS WIKI
Redirected from Spiral Capricorne 90MF
 | |
| Spiral Capricorn 90MF | |
| Also known as: | Screw Capricorne 90MF |
| Basic Information | |
| Number: | BB-102 |
| Owner: | Dr. Ziggurat |
| Face Bolt: | Capricorn II |
| Energy Ring: | Capricorn II |
| Fusion Wheel: | Spiral |
| Spin Track: | 90 |
| Performance Tip: | MF |
| Type: | Attack |
| First appearance: (Anime) | N/A |
| First appearance: (Manga) | N/A |
Spiral Capricorn 90MF (known in Japan and other Asian countries as Screw Capricorne 90MF) is an Attack-TypeBeyblade that appears in the anime and manga series, Beyblade: Metal Masters. Its owner is Dr. Ziggurat. It's part of the Maximum Series because of it Fusion wheel Spiral, 90 height tip, and MF combo. It was released on January 22, 2011 in Japan.
Contents[show] |
Face Bolt: Capricorn/Capricorne
The Face Bolt depicts "Capricornus" (also known as Capricorn), one of the 88 constellations in space and is represented by the "sea-goat", a mythical creature that is half goat, half shark. The design is a yellow outline of a goat's face printed onto a translucent purple Face Bolt.
Energy Ring: Capricorn /Capricorne
- Weight: 3.05 grams
Capricorn II is a fluorescent blue in color that features the horns of a goat, like the previous Capricorn Wheel. The "spikes" on its horns are excellent for Attack.
There is no difference between this energy ring and the original Capricorn energy ring except for the color and the sticker placement.
Attack: 5 - Defense: 2 - Stamina: 1
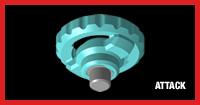
Fusion Wheel: Screw/Spiral
- Weight: 34.51 grams
Spiral resembles a distorted version of Storm with three wings that curve upwards and line down with a small gap between each wing. Each wing has a slope that is bigger than the other one, and features oval-like protrusions that appears to slightly push-up for Smash Attacks. Before it's release, Spiral was said to be able to conduct Upper Attack due to the slopes, however upon testing, it did not show much Upper Attack at all.
While not having the correct slopes for Upper Attacks, it is however able to conduct Upper Smash Attacks. Spiral is a powerful Attack-Type Fusion Wheel but is outclassed by other Wheels like Beat, Lightning, and Variares. Despite this, Spiral can deal a great amount of Upper Smash Attack if used with the right Energy Ring. Specifically, small Energy Rings that expose more of the metal of Spiral, Pisces and Tempo are recommended, however Pisces has better use. Spiral can be used very effectively in the balance combo MF Spiral Tempo (Screw Horogium) 90MF.
Attack: 5.5 - Defense: 1 - Stamina: 1.5
Spin Track: 90
- Weight: 0.82 grams
90 is currently, the second lowest Spin Track and outclassed in terms of Attack and Stamina only by 85.It was first released with Quetzalcoatl 90WF. Before 85's release, 90 was the best Track for low attackers but 85 still outclasses it. Despite this, some Bladers prefer to use 90 over 85 in fear of 85 scraping the floor. Although 90 is outclassed by 85, it still serves as a great Spin Track for low attackers as it does not scrape the Stadium floor as much as 85.
Attack Type Customization
90 is a great Spin Track in Attack combos such as :MF Lightning/Meteo L-Drago 90RF/R2F/MF and MF Vulcan Horuseus\Zurafa\Byxis/Gemios 90RF/R2F/MF.
Stamina Type Customization
90 can also be used in Stamina combos like Burn Kerbecs/Aquario/Bull 90WD/SD/D or Earth Kerbecs/Aquario/Bull 90WD/SD/D.
Performance Tip: MF (Metal Flat)
- Weight: 1.08 grams
Metal Flat has a Flat Tip made of Metal, giving it an offensive movement. However, since metal has more traction than plastic Flat Tips, it has more speed, but it has less friction than plastic Tips, so it has considerably less Defense. This can be avoided when using a Defense spin track like ED145. Unlike XF, LF, F, and WF, it can keep the sliding shoot pattern. MF has more Stamina than RF/R2F/WF/F/XF/LRF/LF/Q, but about the same/less Stamina than SF/FS. It is really powerful in the combo: MF-H Gravity Perseus (Left Spin, Counter Mode) D125/T125/CH120/BD145MF. It is one of the best Attack type Tips, due to its speed, attack power, and stamina.
Attack: 5 - Defense: 0 - Stamina: 2
Trivia
- It is the only Beyblade not have battled in any kind of stadium in the anime, it is also the 1st Bey in the anime to have high power but never won a battle in the series, it shares this with Twisted Tempo 145WD, and Fusion Hades AD145SWD.
- It was the first Beyblade to be released the Spiral Fusion Wheel.
- It is the only Beyblade to be released with 90MF combo.
- It is the first Bey to have the MF tip.
Diablo Nemesis X:D
Talk0
2,018PAGES ON
THIS WIKI
THIS WIKI
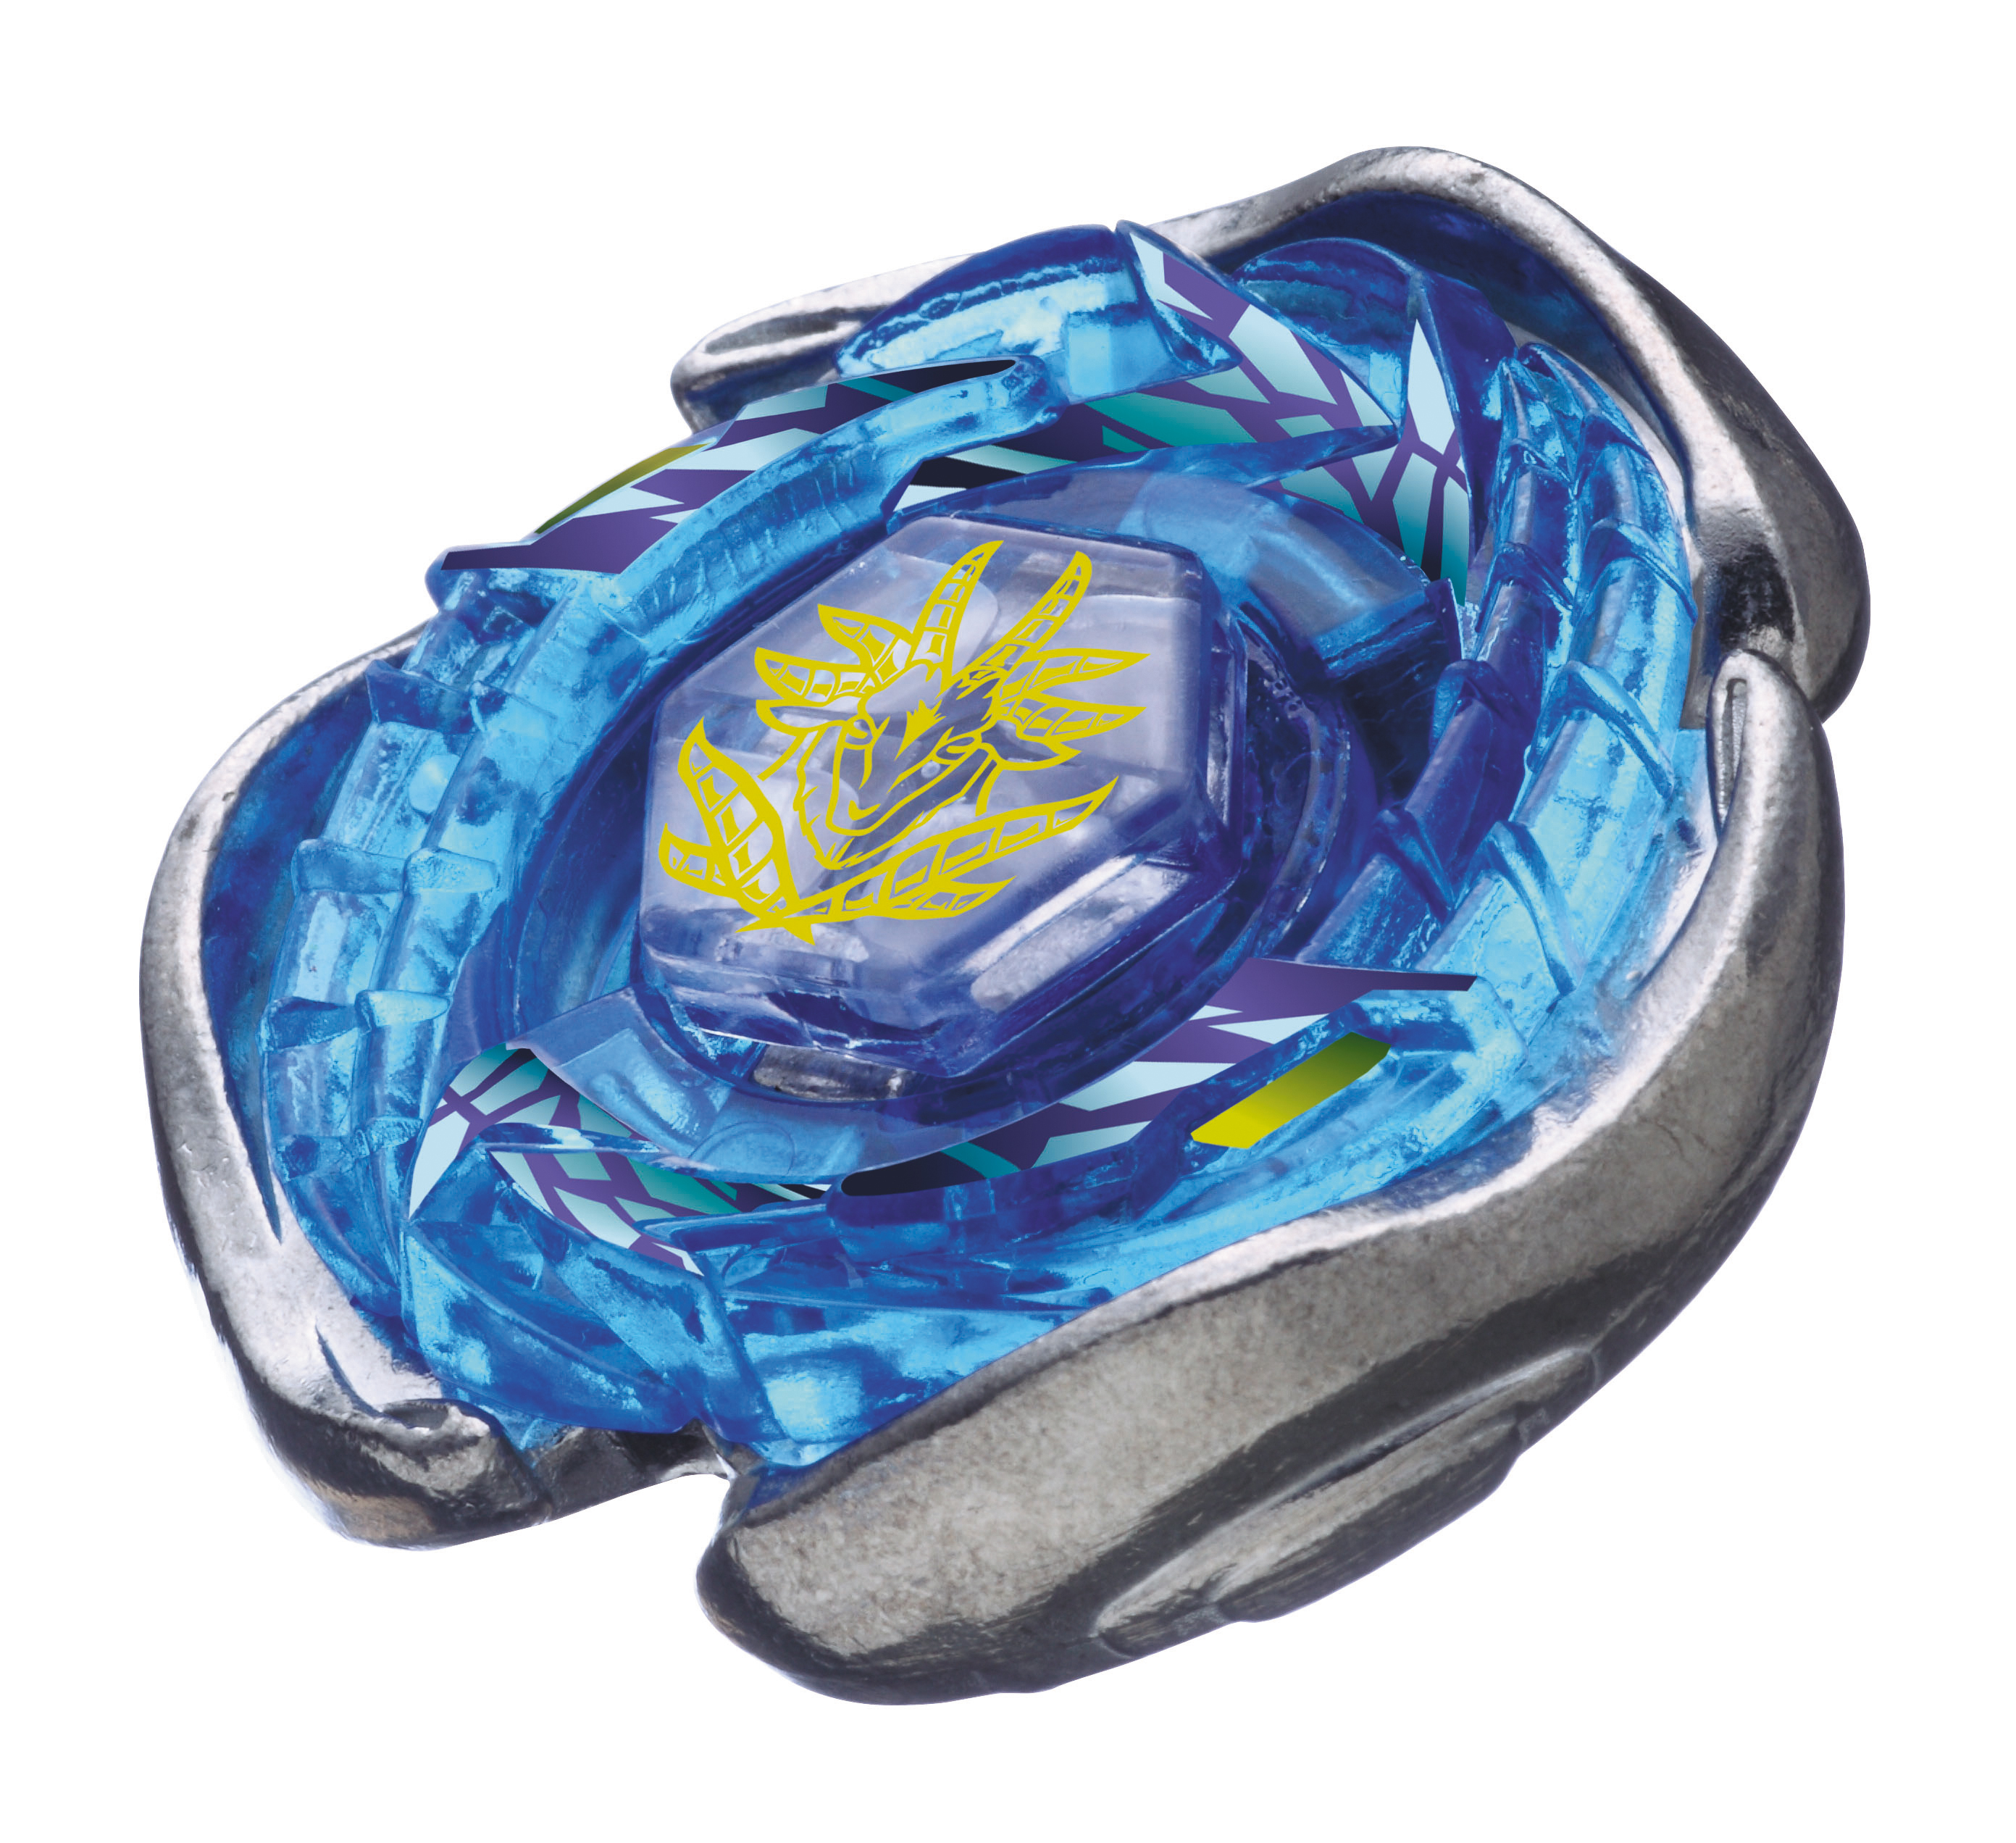
| Diablo Nemesis X:D | |
| Also known as: | Nemesis |
| Basic Information | |
| Number: | BB-122 |
| Owner: | Rago |
| Face Bolt: | Nemesis |
| 4D Energy Ring: | Nemesis |
| Fusion Wheel: | Diablo |
| 4D Performance Tip: | X:D |
| Type: | Balance |
| First appearance: (Anime) | Zeus's Barrier |
| First appearance: (Manga) | N/A |
Diablo Nemesis X:D (Japanese: ディアブロネメシス X:D) is a Balance-Type Beyblade that appears in the anime and manga series, Beyblade: Metal Fury. It is the Beyblade form of Nemesisowned by the series' main antagonist, Rago. It was released on December 27, 2012 in Japan.
Diablo Nemesis is one of the most interesting and uniquely designed Beyblades of Metal Fury. This is so because it takes varying elements of many 4D System Beys to present it. This is used for its Face Bolt, 4D Clear Wheel, and 4D Metal Wheel. Having the heaviest Metal Wheel ever, it is also the heaviest uncustomized MFB Beyblade produced, weighing exactly 62.5 grams,[1] beating Twisted Tempo 145WD, which is 50 grams.
Contents[show] |
Face Bolt: Nemesis
The Face Bolt depicts "Nemesis". In Greek mythology, Nemesis was the spirit of rebuke against the Gods, and was the Goddess of Revenge and Balance. The Face Bolt is quite interesting because it uses elements from many Metal Fury/4D Beyblades to form the Face image of Nemesis. It uses the chin of Variares, the eyes of Phantom Orion, the crown of Mercury Anubius (located above the right eye), an eye of Beat Lynx, the arrow on the left eye of Flame Sagittario, a wing of Big Bang Pegasis, a wing ofDeath Quetzalcoatl, the paw and claws of Fang Leone, the head of L-Drago Destroy, the head of Aquila from Jade Jupiter. The head of Blitz Striker, the scythe of Scythe Kronos, the swan fromKreis Cygnus, the mouth of Duo Uranus, and the helmet ofFusion Hades. Also, if one were to look closely, the Face Bolt forms a perfect skull shape, with the eye sockets included. The motif is featured on a translucent purple Face Bolt.
4D Energy Ring: Nemesis
- Weight: 3.2 grams
The Nemesis Energy Ring, like it's Face Bolt and Fusion Wheel, Diablo, uses different characteristics of Metal Fury Beyblades incorporated into it's design. It uses parts of the Pegasus, Kronos, Uranus, Cygnus, and Jupiter 4D/Metal Fury Energy Rings as a whole. It uses the head design of Pegasus, the scythe design of Kronos, the whirlpool-like shape of Uranus, the swan wings of Cygnus opposite of each other, and the spiky thorn-like details of Jupiter. Nemesis also showcases a Dragon from L-Drago onto it, swallowing its own tail (just like Oroborus). As a whole, Nemesis is also reminiscent of Aquario; due to their circular shape, and Nemesis' dragon's head and tail resembling Aquario's waves, all this said, the design does also look like a mermaid and a skeletal mermaid circling each other. Nemesis weighs 3.2 grams, which put is on pair with the one of the heaviest Energy Rings for Defense; Bull, Aquario, and Kerbecs (Aquario weighs the same as well) but it is still outclassed by Bull, which weighs 3.3 grams. The Nemesis Energy Ring is a translucent black in color. Its design is also very similar to that of the original Pegasus Energy Ring.
Attack: 1 - Defense: 2 - Stamina: 4

4D Fusion Wheel: Diablo
- Total Weight: 52.16 grams
Metal Frame
Diablo's Metal Frame is a circular Frame that primarily consists of three heads. These include, a design that resembles the smirk of Phantom Orion with blue/purple eyes, the face of a beast with green eyes and tusks, and the head of Fang Leone. It does feature some jagged paw-like protrusions around it as well. This might pay somewhat of a homage to the Biblical description of a "Cherub", a creature with the face of a man, a bird, and a lion. Yet the stickers of the eyes are extremely flimsy, so it falls of easily. Also, because of the different parts, the air force is a little floppy, and weight balance distribution is off, but it is hard to see it.
Core
Diablo's Core is also a circular Core that also borrows designs from many Metal Fury/4D Beys. They are as follows, a part of Scythe Kronos T125EDS, a part of Blitz Striker 100RSF, a wing design of Death Quetzalcoatl 125RDF, a part of Fusion Hades AD145SWD, a part of Flash Sagittario, a part of Variares D:D, a dragon's head/neck of L-Drago Destroy F:S, and a wing design of Big Bang Pegasus F:D. Other than this, the Core does indeed appear bulky and thick.
Diablo's main gimmick is the ability to pair up two of the aforementioned Beyblade designs together in order to form one of the main contact points. Other than this, Diablo has taken a massive makeover compared to it'sPrototype, Proto Nemesis.
Just like the rest of the 4D Fusion Wheels, Diablo features a Mode Change. With a total of two Modes, them being "Attack Mode" and "Ultimate Balance Mode". In Attack Mode, Diablo appears just like it's official picture but in Ultimate Balance Mode, Diablo appears to be turned upside-down with the Nemesis 4D Energy Ring being pushed up. Diablo's Metal Frame is also free-spinning in Ultimate Balance Mode.
Performance wise, when Diablo is in Attack Mode, it features high recoil due to it's many 4D/'Metal Fury Beybladedetails in it's design. While in Ultimate Balance Mode, it's recoil is very low and can hold it's ground against Beys such as Hades Kerbecs BD145DS. Because of S²D and S, as well as Diablo's Metal Frame being free spinning, Diablo's Stamina is quite good but that only occurs when it's in Ultimate Balance Mode, since S²D cannot be used when Diablo is on Attack Mode and since the Metal Frame is only free-spinning in that Mode.[2] But still, many people prefer using Attack Mode because Diablo's attack power is a main way to win a battle, especially against some Stamina type Beyblades such as Phantom Orion B:D. Another reason is if you use Diablo in Ultimate Balance Mode, it doesn't just reduce its Attack ability, but also causes Stamina loss when it is knocked by other Beyblades, because of its free spinning Metal Frame. In Attack Mode, Diablo has use in Smash Attack combinations.
Customisations
- Diablo Orion B:D (Stamina)
- Diablo Kerbecs BD145MB (Defense)
- Diablo Nemesis BD145R²F (Attack)
- MF-H Diablo Giraffe / Zurafa BD145RF (Attack)
- MF-H Diablo Pegasis 125RDF (Balance)
- Diablo Unicorno / Striker D125CS (Balance)
- MF-H Diablo Nemesis S130MB (Defense)
Attack: 4 - Defense: 2 - Stamina: 1
4D Performance Tip: X Drive (X:D)
- Weight: 7.3 grams
X:D (X Drive) features three Performance Tips, much like D:D, which are XF (Extreme Flat), a new Tip by the name of S²D (Stern Semi Defense) and S ( Sharp), the Tips are quite small however.
X:D appears to be a hybrid of D:D and F:D/F:S. As the Tips follow patterns but do not always use the same; it can occur from XF, S²D, to S or S to S²D to XF[3], but this automatic change only takes place when Diablo is in Ultimate Balance Mode, since Attack Mode only allows for manual changes, similar to D:D. S²D only appears in Ultimate Balance Mode however. The XF on X:D is more like a XHF (Extreme Hole Flat). You should know that most of X:Ds mode switches are unsuccessful.
As soon as it gets hit, it switches to the next Tip in X:D. For BS, the bottom of X:D creates a small protrusion shaped like Sharp's Tip, but not of the same height. For S²D, the protrusion becomes smaller and appears circular, much like B or WB; even though S²D is meant to be SD's upgrade. Finally, for XF, the protrusion retracts inside X:D's bottom and now appears flat, used for XF's fast and aggressive movement. Also having the height of a 145, X:D regains balance fast, after each attack in sharp mode.
For Attack Mode, whose tip changes manually, people usually use the Sharp tip. The reason is because it can provide more stamina than that of XF, and also hit another beys easier because of its slower movement, instead of just moving around the stadium and stop spinning just after a short period of time. You may say sliding shoot can solve this problem, but it cannot as XF is too wide and the bey will just move around on the outer part of the stadium right after the sliding shoot, and also because of the heaviness of Diablo. We do not need to worry about the weaker Attack power of S since a number of videos and testings showed that Diablo Nemesis X:D gives Stadium Outs to other beys with the Ball Sharp Mode only.
Although the S tip may easily lose balance and causes floor-scrapes, X:D has a funnel-like design and this design can help the bey remain spinning when it losses balance. X:D has a purple tip at the bottom that reveals the three aforementioned Performance Tips. It is a translucent light purple in colour.
Attack: 3 - Defense: 2 - Stamina: 2
Overall
Diablo Nemesis X:D is one of the best beys due to the fact it has low recoil, high Attack power, and decent stamina.
Other versions
- Red Nemesis - Bright red recolour of the Nemesis 4D Energy Ring, currently released with Diablo and a WBBA Face Bolt for winning 1st Place in an official WBBA tournament.[4]
- Diablo Nemesis Dragren Version - Red recolour of Diablo Nemesis with green decals, part of the "Beyblade & B-Daman 2012 Dragon Campaign". It is called Dragren due to the swapped color with a Cross Fight B-Daman known as Dragren which was red and has been released as "Dragren Nemesis Ver." which was silver and purple, only 100 of this Diablo Nemesis variant are produced. To obtain it, one must buy one of the latest Beyblade products and send it's bar code by mail to Takara Tomy with a downloadable postcard.[5]
- Diablo Nemesis Gold and Red - It is seen in the Strongest Dragonis 4D Guide. The Energy Ring is red and the color of the Fusion Wheel is Gold.
Assinar:
Postagens (Atom)